! UNDER DEVELOPMENT !
Modding my Steam Deck OLED
I have a shocking amount of friends who have a Steam Deck. I have one, my fiance has one, my friend Dustin has one, and so does half of our friend group. This made for a funny situation where, when we got together for our retreat last year, we had a half dozen identical Steam Decks floating around our AirBnB, and it was easy to pick up the wrong one. Another issue I've been having? 512 GB is simply too little for all the games I want on the Deck at once.
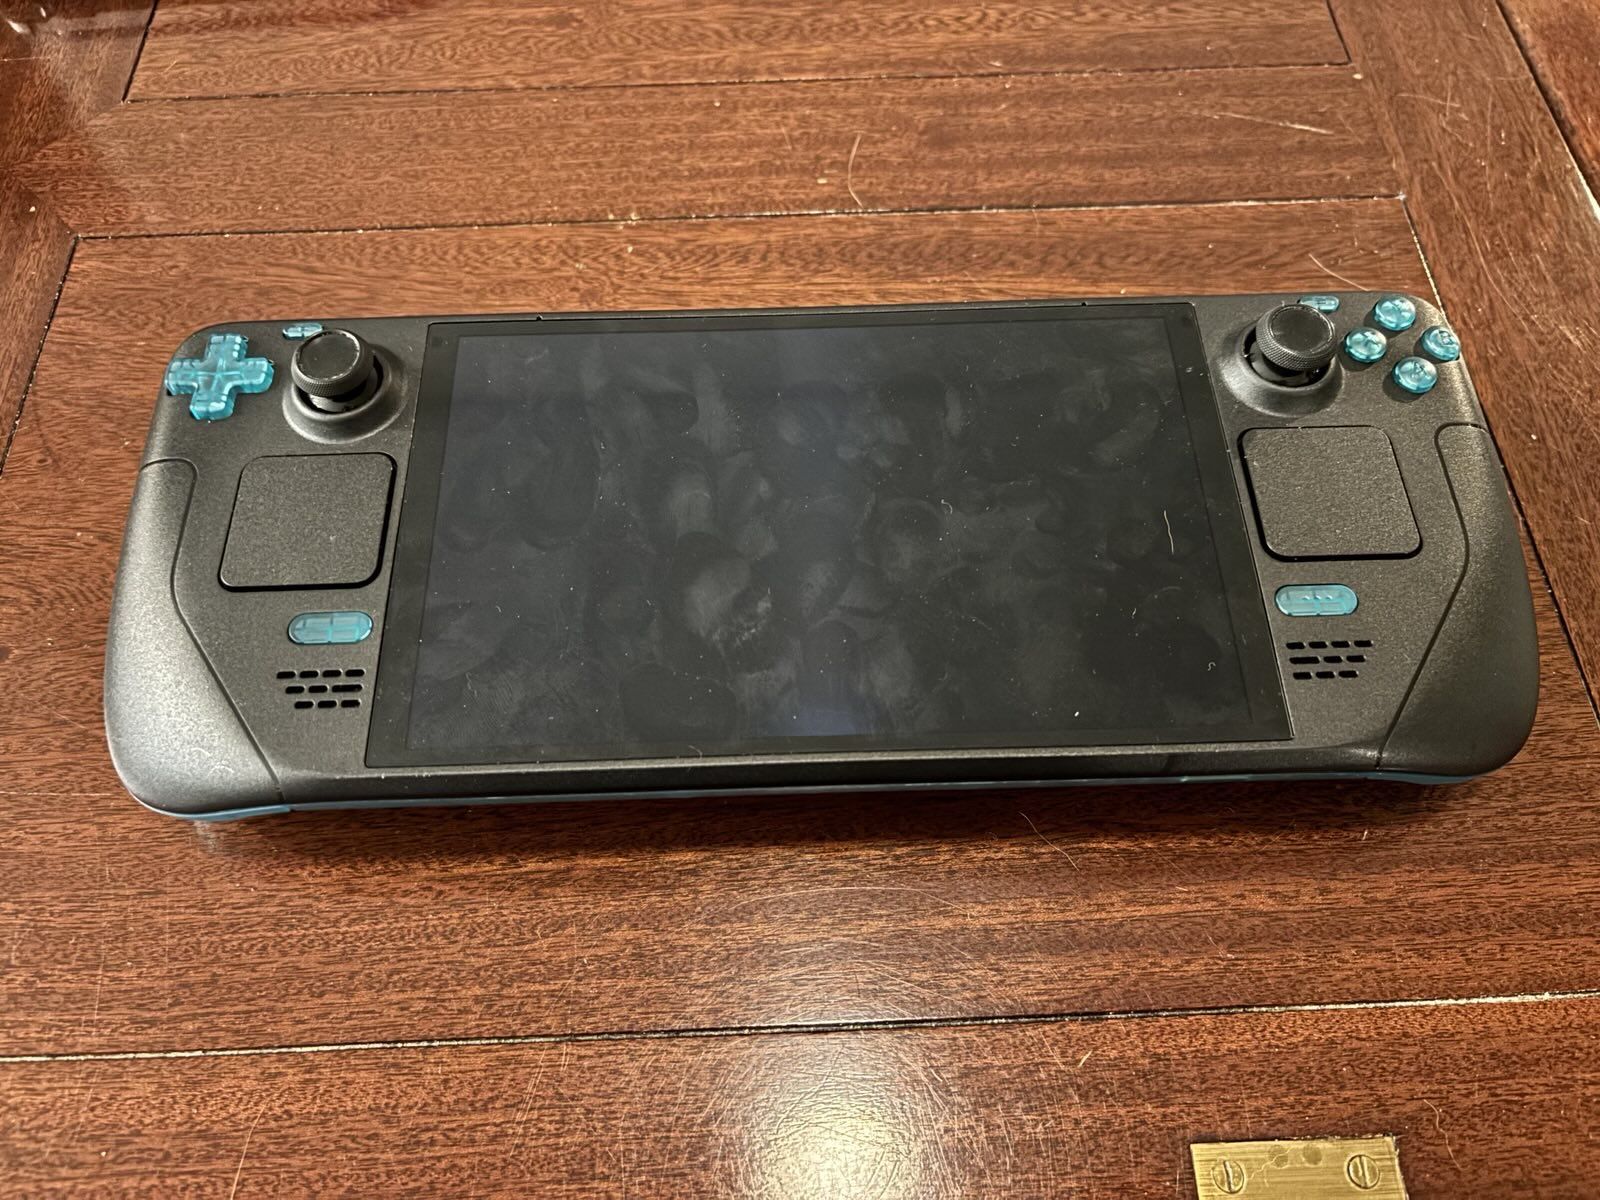
I decided to kill two minor birds with a very expensive stone, and mod my OLED Steam Deck with a partial new shell (more on that "partial" later) and swap out its SSD with a 2TB one. My fiance upgraded hers with a similar SSD about a year ago, and since then SSD prices have climbed so much that mine was $100 more than hers (~$240 vs ~$140). Because of that, adding a shell was chump change by comparison, only ~$40. I chose an ExtremeRate Shell, as it's the only option with a good selection of colors. Being a child of the early 2000s, it was only natural to pick a translucent color, and I opted for the "Emerald Green".
I decided that doing a full shell swap was too much of a pain in the ass after reviewing a lot of the guides on how to do it. You have to entirely take apart the Steam Deck, delaminate the screen, re-adhere it to the new shell, then rebuild the entire Steam Deck inside it, and making sure to re-grease the APU with thermal paste. That is all well within my skillset, but undoing adhesive makes any electronics DIY project get really awful really fast. And this was supposed to be fun, not agonizing. Besides, I didn't want to risk damage to the screen, and I've even read that it raises the panel a bit out of the shell, giving a bit of a ledge to the screen which sounds annoying. So, what I opted to do instead was replace the back plate and buttons of the Deck with the green ones, and give it a bit of a dual-tone look.
Preparation
Before doing this, I made a SteamOS Recovery drive so I could load the OS onto the Steam Deck once I put the new SSD in. You can also clone your current SteamOS install to the new drive, but I decided I wanted to re-do my current install and set up my CSS loader a bit differently. Since Steam backs up all my game saves for ones I've bought through their store, the only backups I had to do were for my KSP install (I bought it before it was on Steam) and my retro games. I threw that on a USB-C flash drive, made the recovery drive on another one, then was ready to open it up.
...Except, it turned out iFixit recommends discharging the battery to <20% and putting it into steam's "Battery Storage Mode" so that you don't have a thermal event. So with 34% on my steam battery, I spun up a game of Split Gate, cranked the brightness and volume to 100%, and the internal resolution to 1440p. That got the battery down to 20% in about 15 minutes. With that, it was now time to mod my Deck.
Procedure
ExtremeRate provides a video guide for how to do the full swap, but I much prefer written guides, so I followed a few iFixit Replacement Guides, which I'll provide in order if someone out there wants to do the same thing:
-
Action Buttons (starting at step 13)
-
Quick Access Button (Starting at Step 10)
Steam Deck Mod Blog Post
-
D-Pad (starting at step 11)
-
Audio Board to replace +/- volume buttons (starting at step 11)
-
Steam Button (Starting at step 13)
I won't detail that whole procedure since I mainly just, y'know, followed the instructions and iFixit does a much better job than I would of writing instructions and taking good pictures of these procedures. But I do have a few notes on the whole experience.

One, good luck doing the power button. Doing this requires taking out the whole mother board/cooling assembly, and at that point you might as well do a full swap. I decided I could live with a little orange accent.
Two, I found it unecessary to actually unadhere the interconnect cable from the heat shield behind the APU. I just left it on, disconnected it from the action buttons side, and gently folded back the heat shield and unplugged the power supply and swapped the SSD. For the remainder of the repair, I left the plate unscrewed and the power cable outside of it until I was ready to close it back up.
Three, the volume buttons were very difficult to get out. Even after removing the audio board, I had to force the shell around it to bend slightly while pushing the buttons into the console with a spudger. It was a pain but it eventually worked... for one of the buttons. That left the other still in that slot, with the removed one attached by the membrane. I actually ended up ripping that membrane with my tweezers and rotating the button to get a good angle to force it out. That wasn't a big deal, though, since the ExtremeRate kit comes with a spare membrane.
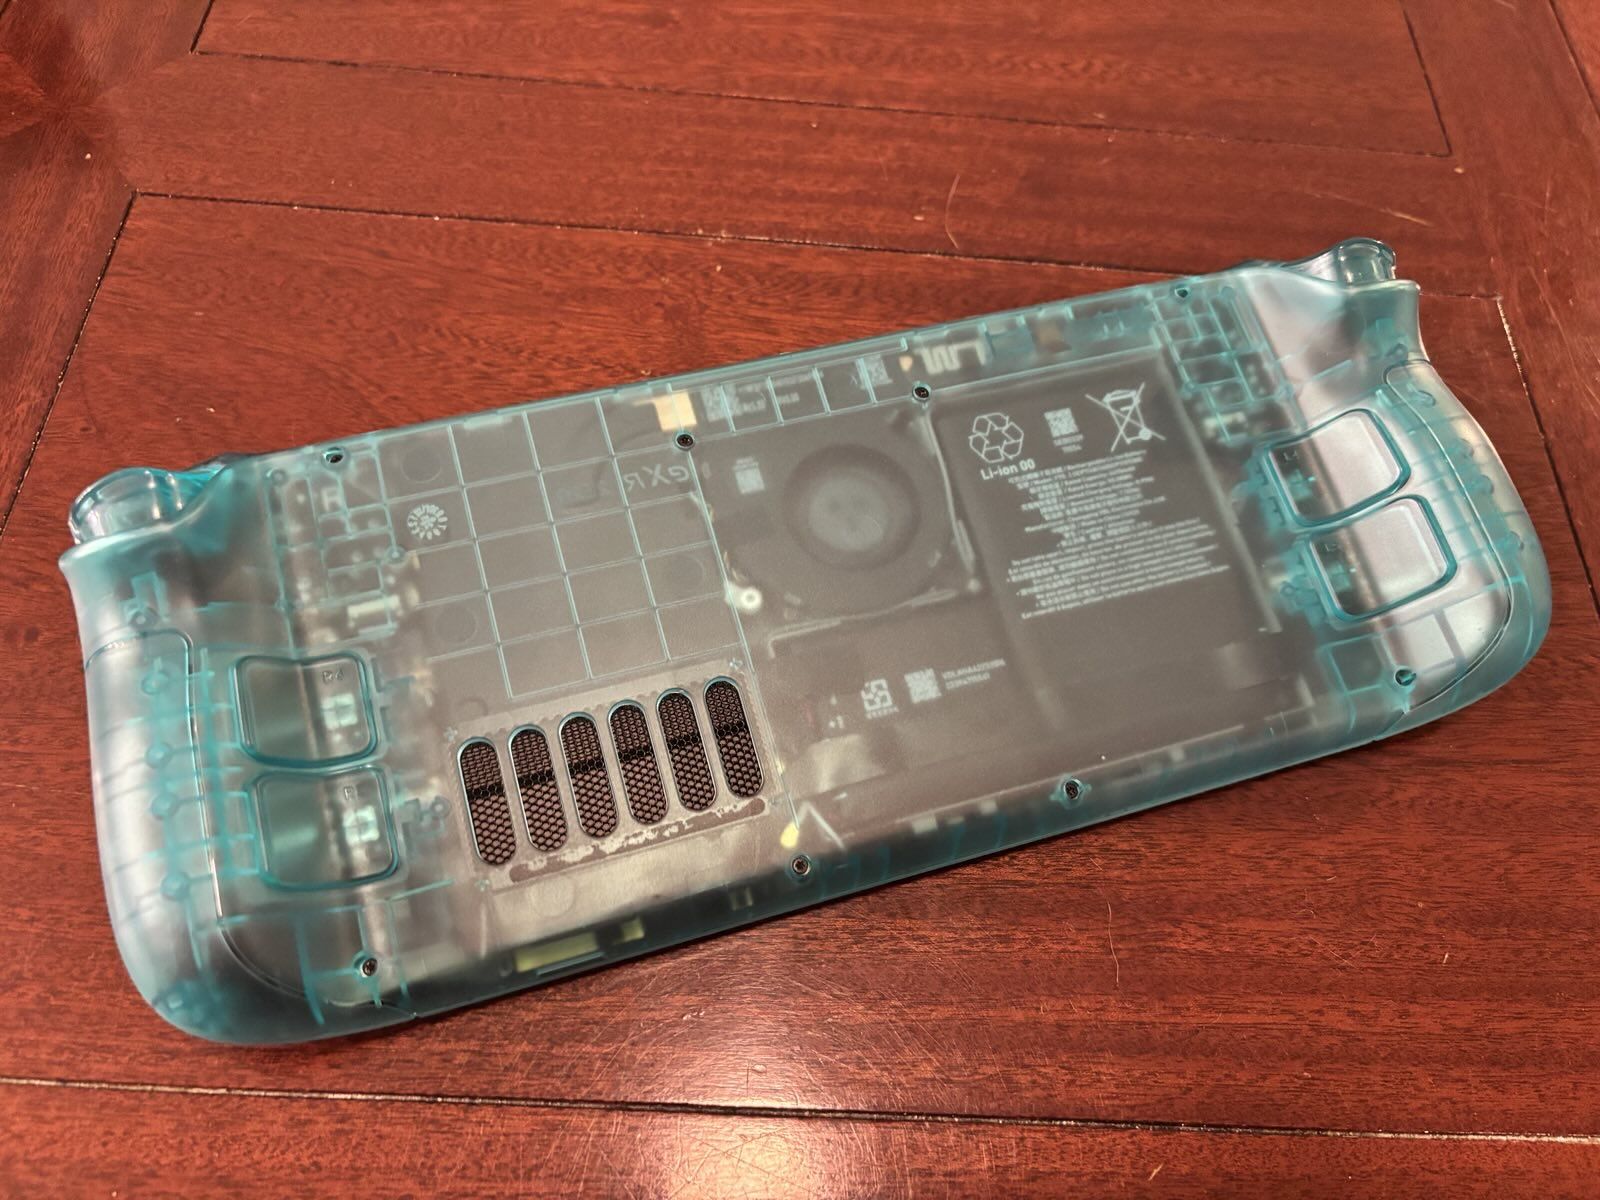
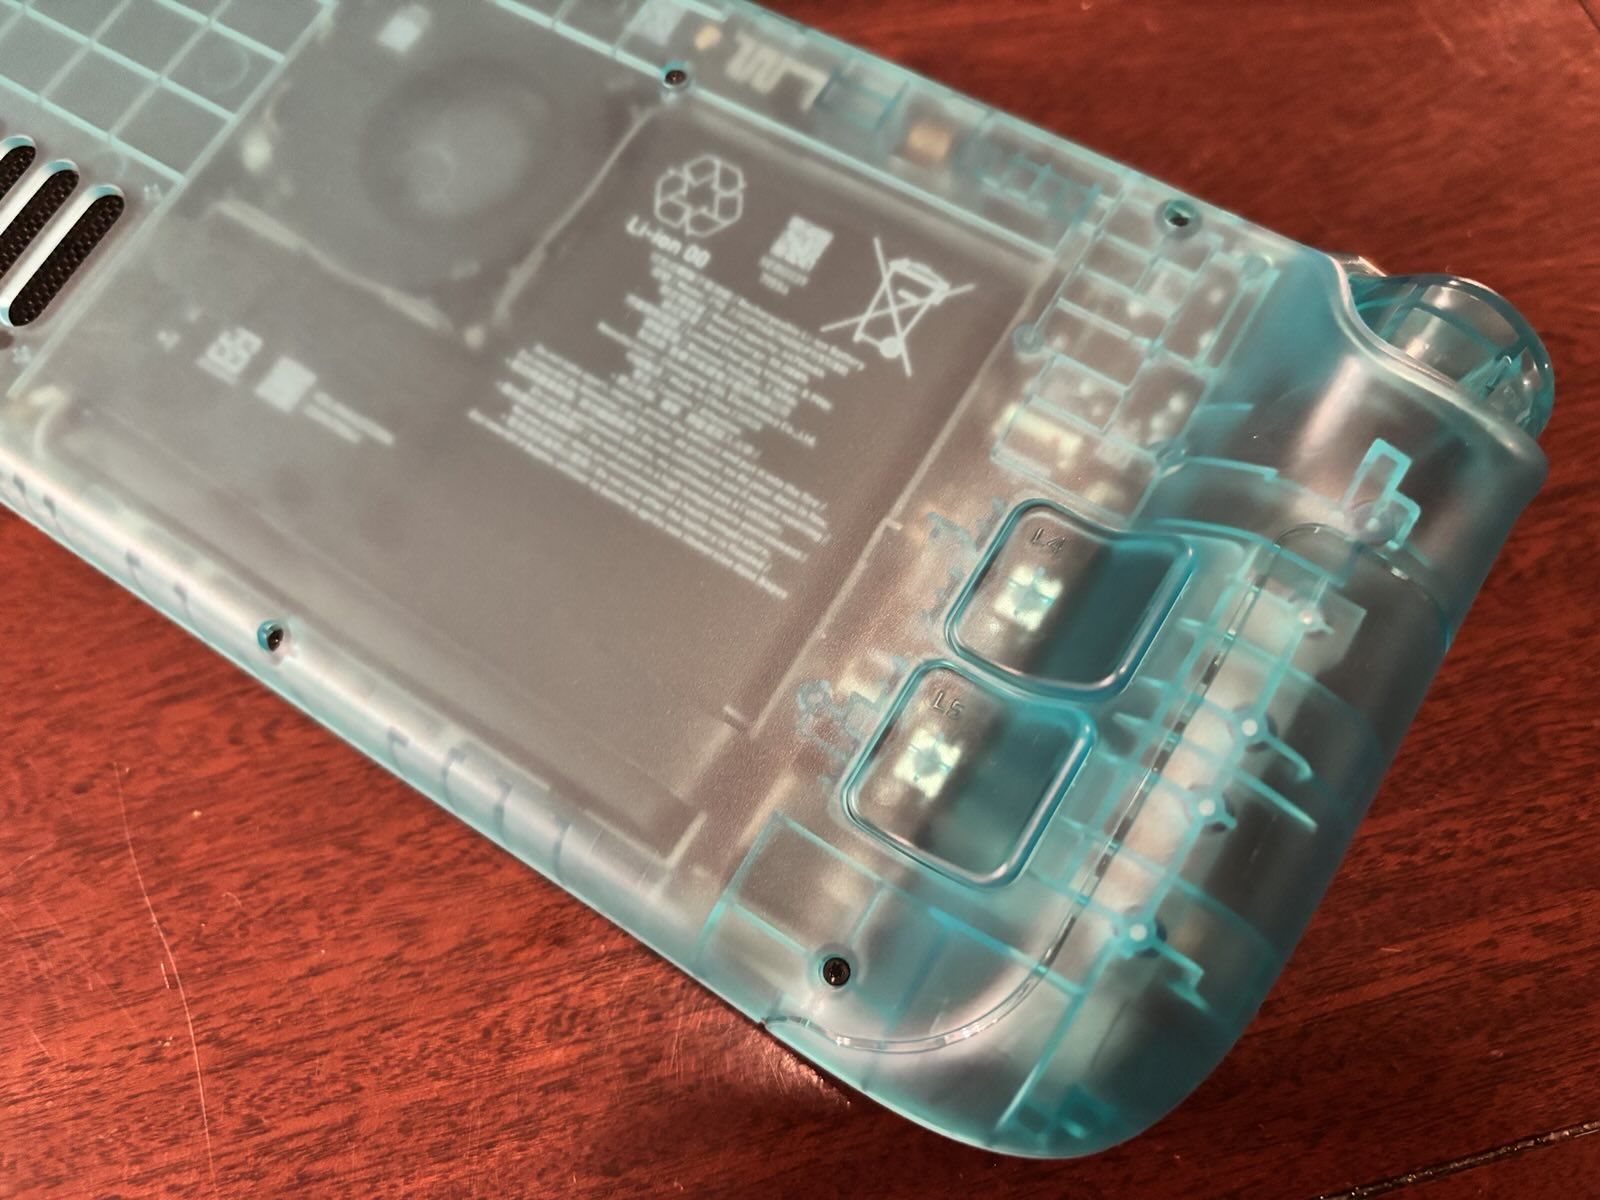
After replacing the buttons, I reconnected the various button boards, then added the back plate. It actually requires a little assembly, you have to put in the back buttons, screw them in, then adhere the little vent grate to the back of the vent holes. They also try to get you to put on what they call "shielding". This is an adhesive black rectangle of paper-y material that I assume is either for thermal dissipation or EMI shielding. The issue is, adding a black, opaque square to the backplate would've totally fucked up the aesthetics, so I just left it off--FCC be damned.
This was the result:
Conclusion
I'm very happy with the result! This was a fun DIY project, it took a few hours but not in a frustrating way. It looks great, the SSD is huge, and I will finally be able to distinguish my Steam Deck from my friends' when we get together this year.
Further, doing this really made me appreciate how well designed this hardware is. Valve really put a lot of energy into making this a console that is repairable and upgradeable. The controls all being on their own replaceable daughterboards mean that these things will be easily serviceable for as long as parts are available, and the inside is laid out in a fairly reasonable way to allow for these repairs.
The main improvements I'd like to see Valve make is a better solution for that interconnect cable. If instead of it being adhered to both the battery and the heat shield, it was routed through some hooks in the frame, it would really help the repair experience. I'd love to see that magic iPhone battery adhesive that detaches with a 9 volt battery used here too, maybe even around the OLED in addition to the battery.
P.S.
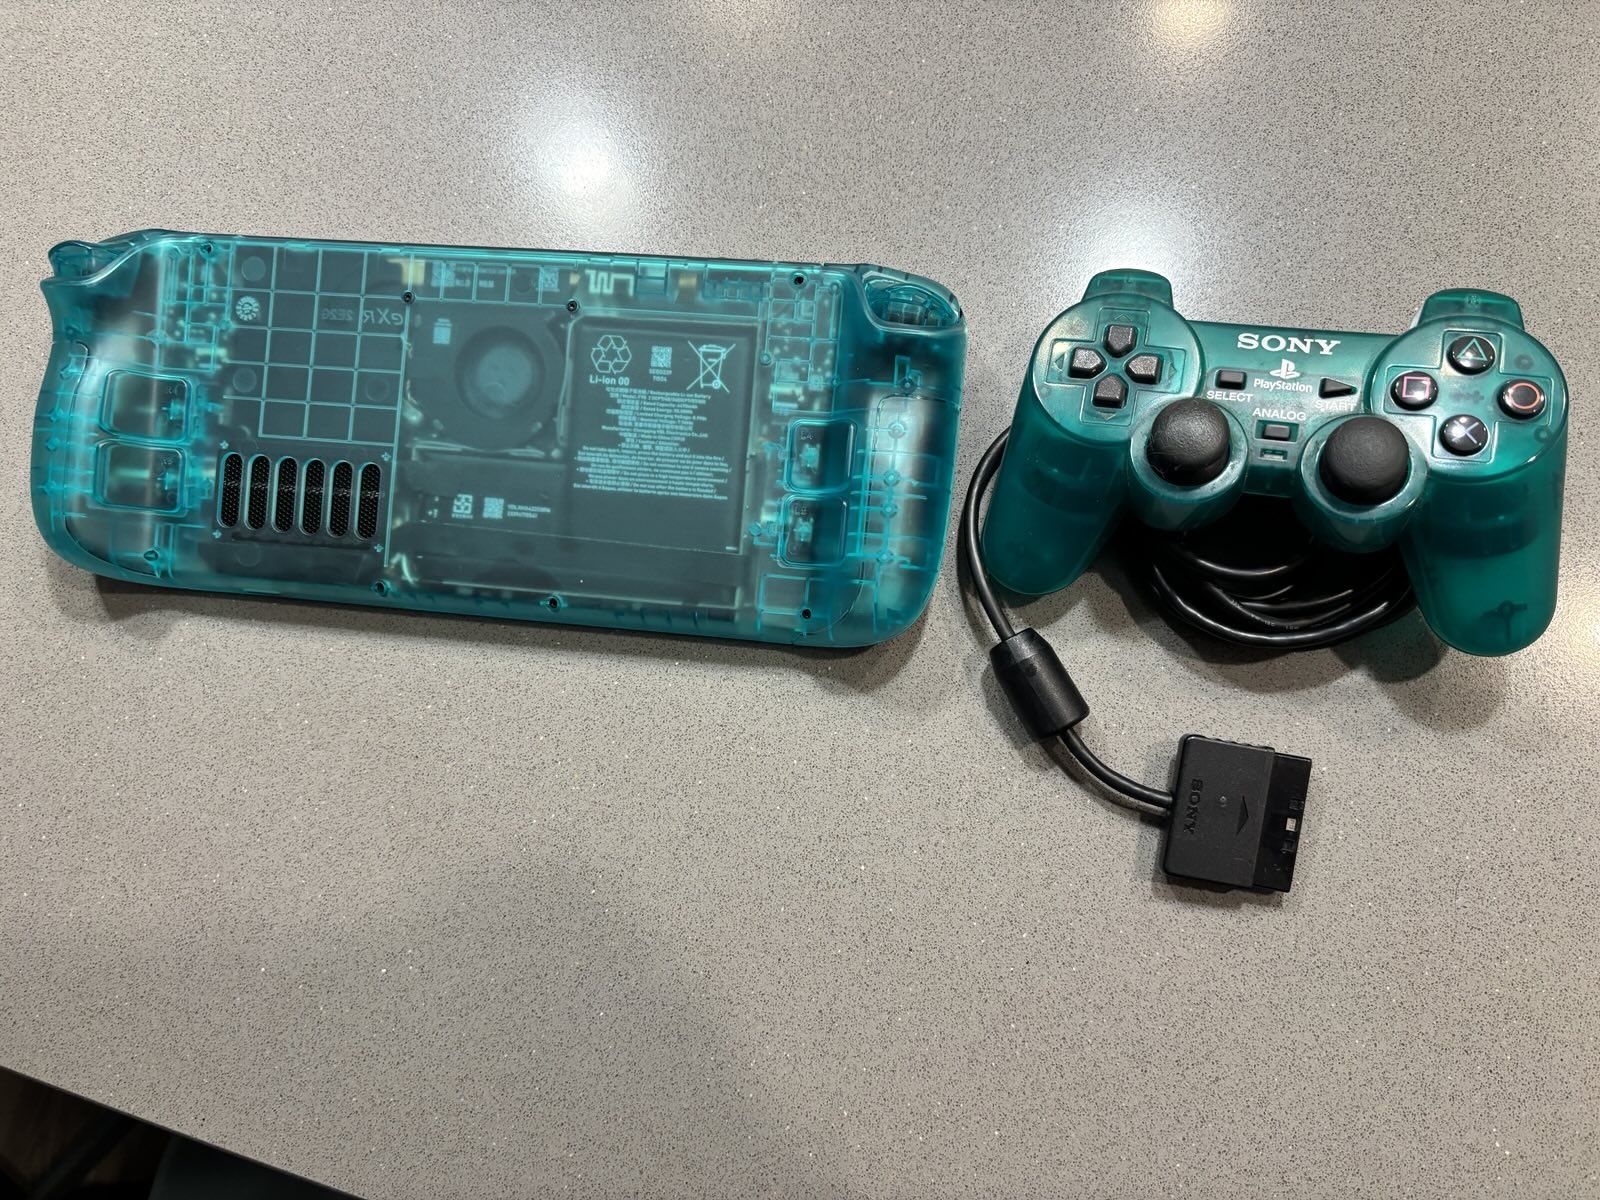
As a bonus, I realized this shell is the exact same color as my old DualShock 2 from my childhood. Funny coincidence!
- ← Previous
Dolson's Blog is now active!